
Introduction
This notes summaries UI implementation with Fragment and other entities in Android SDK. It explains:
- How an app starts and UI is generated via
ActivityandFragment. - How the UI is displayed via XML layout and
Viewalone. - How the UI is generated from XML via
LayoutInflater. - How the UI is displayed and interacted via
Viewbinding. - How the UI is updated when there is changes in user interaction via LiveData, ViewModel,
Data BindingandLifecycleOwner
In this blog, I explore the first 4 tasks. First I discuss the concepts used to implement such tasks and then demo with a simple app that has a navigation menu.
Concepts
The following section attempts to explains various entities that works together to generate view and performs the 4 task listed in Introduction.
- The entry point:
MainActivityand how to add aFragmentinstance to anActivity. - How to create a
Fragmentand bindViewto it. - How to update the UI via
LayoutInflater, andLiveDatawhenLifecycleOwnerchanges.
Main Activity
MainActivity is the activity that starts the app. It is also the entry point of any app.
For each activity, there is life cycle, maintained by activity stack and activity state.
The callback functions such as onCreate, onResume, onPause, onDestroyed responses to user interaction and changes the activity life cycles

- To start main activity, we override function
onCreate, which launches the activity, puts it on foreground, and changes the state to running. - To add UI to activity, we override function onCreate and do any the following:
- add a
view, named by layout ID, defined by layout resource xml file, invoke functionsetContentView. - or add fragment to activity.
- add a
- Note:
onCreateis called only once in the entire lifecycle,onStartis called whenever the activity becomes active and visible to user.
The following adds View, indicated by layoutID, defined by R.layout.home_page.
class MainActivity : AppCompatActivity() {
    override fun onCreate(savedInstanceState: Bundle?) {
        super.onCreate(savedInstanceState)
        setContentView(R.layout.fragment_home_page)
    }
}
Fragment
Fragment represents a reusable portion of your app's UI. Defining Fragment and adding it to Activity rather defining a single View and displaying it on Activity provides more flexibility such as:
- Modularity: a single
Activitycan use multipleViews, each of which is attached to aFragment. Thus a fragment is a portion of the UI on screen. - Reusability: a
Fragmentand itsViewcan be used be multiple activities. - Navigation: fragments allows flexible navigation between
Views, each of which is attached to a fragment. Can even add animation when transition between fragment/views. - Communication: sharing data between fragments. Fragments can communicate with each other and with their parent activity
While UI can be displayed by View alone, Fragment allows us to reuse UI, and responses to certain events, or state change in the activity.
Fragmenthas its own life cycle, and invoked by callbacks such asonCreateView,onViewCreatedetc

- Note:
onCreateis called only once in the entire lifecycle,onStartis called whenever the fragment becomes active and visible to user. Fragmentcan only be created when a validViewis provided:- in its constructor or by
findViewById(R.id.main_page_id) - in onCreateView callback. We also have to use
Viewbinding andLayoutInflaterwhich is to be explained later.
- in its constructor or by
Fragmentmust be added to activity by the following steps:
- define Fragment in XML layout resource file and add the fragment's id to Activity XML resource file
- create a fragment class and override
onCreateViewcallback - add a fragment to activity class, in function
onCreatecallback
Step 1: create Fragment layout resource file. The following illustrates a Fragment layout which has 2 items on it.
fragment_home_page.xml
<?xml version="1.0" encoding="utf-8"?>
<LinearLayout xmlns:android="http://schemas.android.com/apk/res/android"
    xmlns:app="http://schemas.android.com/apk/res-auto"
    android:id="@+id/home_page_id"
    android:gravity="center">
    <com.google.android.material.card.MaterialCardView>
        <ImageView
            android:id="@+id/id_image"
    </com.google.android.material.card.MaterialCardView>
    <TextView
        android:id="@+id/text_view_name"
        android:textAlignment="center" />
</LinearLayout>
Activity_main.xml must includes FragmentContainerView and android:id of the Fragment
<?xml version="1.0" encoding="utf-8"?>
<androidx.constraintlayout.widget.ConstraintLayout xmlns:android="http://schemas.android.com/apk/res/android"
    xmlns:app="http://schemas.android.com/apk/res-auto"
    xmlns:tools="http://schemas.android.com/tools"
    android:id="@+id/main"
    android:layout_width="match_parent"
    android:layout_height="match_parent"
    tools:context=".MainActivity">

    <androidx.fragment.app.FragmentContainerView
        android:id="@+id/fragment_home_page"
        android:layout_width="match_parent"
        android:layout_height="match_parent" />

</androidx.constraintlayout.widget.ConstraintLayout>
Step 2: create a fragment class and override onCreateView callback. Note that the fragment's id fragment_home_page is used and "inflated" by LayoutInflater which instantiates a layout XML file into its corresponding View objects.
class HomePageFragment : Fragment() {
    override fun onCreateView(
        inflater: LayoutInflater, container: ViewGroup?,
        savedInstanceState: Bundle?
    ): View? {
        // Inflate the layout for this fragment
        return inflater.inflate(R.layout.fragment_home_page, container, false)
    }
}
Step 3: add a fragment to activity class, in function onCreate callback. Below is the long version of the codes that indicates:
- a
FragmentManageris created. - a
FragmentTransactionis started. FragmentTransactionadds the custom fragment to activity.- Note that
setContentViewnow acceptsView's layout_idactivity_mainof Main Activity's View instead offragment_home_page
class MainActivity : AppCompatActivity() {
    override fun onCreate(savedInstanceState: Bundle?) {
        super.onCreate(savedInstanceState)
        setContentView(R.layout.activity_main)

        // Create an instance of the fragment
        val homePageFragment = HomePageFragment()
        // Get the FragmentManager
        val fragmentManager: FragmentManager = supportFragmentManager
        // Start a FragmentTransaction
        val fragmentTransaction: FragmentTransaction = fragmentManager.beginTransaction()
        // Add the fragment to the activity
        fragmentTransaction.add(R.id.fragment_home_page, homePageFragment)
        fragmentTransaction.commit()
    }
}
The codes above could be shorten by chaining calls:
// Add the fragment to the activity using the fragment manager and a transaction
        supportFragmentManager.beginTransaction().apply {
            add(R.id.fragment_home_page, HomePageFragment())
            commit()
        }
Note apply is an extension function in Kotlin. In this case, it sets the scope (lamda expression) on the object TransactionManager, and performs 2 function calls add and commit.
View binding
View Binding is part of the Android Jetpack library, makes it easier and safer to interact with Views in your XML layouts by generating a binding class for each XML layout file.
For example, if we use View binding with Activity class, then we have ActivityMainBinding binding class automatically generated. We can use it by import com.example.myid.databinding.ActivityMainBinding
For the above codes, we could use View binding instead of calling the layout_id of MainActivity, and HomePageFragment.
To use View binding on Activity such as MainActivity, modify onCreate callback in 3 steps as below:
package com.example.myid

import android.os.Bundle
import androidx.appcompat.app.AppCompatActivity
import com.example.myid.databinding.ActivityMainBinding     // import generated binding class

class MainActivity : AppCompatActivity() {
    // Step 1: Generated binding class
    private lateinit var binding: ActivityMainBinding

    override fun onCreate(savedInstanceState: Bundle?) {
        super.onCreate(savedInstanceState)
        // Step 1: Generated binding class
        binding = ActivityMainBinding.inflate(layoutInflater)
        // Step 2: Get a reference to the root view
        val view = binding.root
        // Step 3: Pass the root view
        setContentView(view)

        // Add the fragment to the activity using the fragment manager and a transaction
        supportFragmentManager.beginTransaction().apply {
            add(R.id.fragment_home_page, HomePageFragment())
            commit()
        }
    }
}
To use View binding on Fragment such as HomePageFragment, modify onCreateView callback in 3 steps as below:
package com.example.myid

import android.os.Bundle
import androidx.fragment.app.Fragment
import android.view.LayoutInflater
import android.view.View
import android.view.ViewGroup
import com.example.myid.databinding.FragmentHomePageBinding

class HomePageFragment : Fragment() {
    // binding class
    private var _binding: FragmentHomePageBinding? = null
    // property of binding class
    private val binding get() = _binding!!

    override fun onCreateView(
        inflater: LayoutInflater, container: ViewGroup?,
        savedInstanceState: Bundle?
    ): View {
        // Step 1:
        _binding = FragmentHomePageBinding.inflate(inflater, container, false)
        // Step 2:
        val view = binding.root
        // Step 3:
        return view

    }

    override fun onDestroyView() {
        super.onDestroyView()
        _binding = null
    }
}
Note View binding is slightly different from Data binding, which will be discussed in later blogs.
Note: Fragment and View binding concepts together are especially useful to implement navigation menu. In Sample App section, I demonstrate such use.
Sample App MyID
Using View binding
fragment_home_page.xml:
The file defines the layout of HomePageFragment including 1 container for image, and 3 textboxes.
<?xml version="1.0" encoding="utf-8"?>
<LinearLayout xmlns:android="http://schemas.android.com/apk/res/android"
    xmlns:app="http://schemas.android.com/apk/res-auto"
    android:id="@+id/main_page_id"
    android:layout_width="match_parent"
    android:layout_height="match_parent"
    android:orientation="vertical"
    android:padding="16dp"
    android:gravity="center">
    <com.google.android.material.card.MaterialCardView
        android:layout_width="wrap_content"
        android:layout_height="wrap_content"
        android:layout_gravity="center_horizontal"
        app:cardCornerRadius="20dp"
        app:strokeWidth="1dp"
        app:strokeColor="#002FFF"
        android:padding="2dp">
        <ImageView
            android:id="@+id/id_image"
            android:layout_width="wrap_content"
            android:layout_height="wrap_content"
            android:contentDescription="ID Image"
            android:src="@drawable/image_id" />
    </com.google.android.material.card.MaterialCardView>
    <LinearLayout
        android:layout_width="match_parent"
        android:layout_height="wrap_content"
        android:orientation="vertical"
        android:layout_gravity="center" />
    <TextView
        android:id="@+id/text_view_name"
        android:layout_width="wrap_content"
        android:layout_height="wrap_content"
        android:text="Name:"
        android:textAlignment="center" />
    <TextView
        android:id="@+id/text_view_department"
        android:layout_width="wrap_content"
        android:layout_height="wrap_content"
        android:text="Department:"
        android:textAlignment="center" />
    <TextView
        android:id="@+id/text_view_employee_id"
        android:layout_width="wrap_content"
        android:layout_height="wrap_content"
        android:text="Employee ID:"
        android:textAlignment="center" />
</LinearLayout>Note: be very consistent in the name of those xml files:
- Because of
Viewbinding,FragmentHomePageBindingis generated from the name of the xml file. Thus in the fileHomePageFragment.tk, we have to import and then make correct binding:
HomePageFragment.tk
import com.example.myid.databinding.FragmentHomePageBinding

class HomePageFragment : Fragment() {
     private var _binding: FragmentHomePageBinding? = null
     private val binding get() = _binding!!
     // other codes as showed in earlier sections
}- Because of
Viewbinding,FragmentUpdatePageBindingis generated from the name of the xml file. Thus in the fileUpdatePageFragment.tk, we have to import and then make correct binding:
UpdatePageFragment.tk
import com.example.myid.databinding.FragmentUpdatePageBinding
class UpdatePageFragment : Fragment() {

    private var _binding: FragmentUpdatePageBinding? = null
    private val binding get() = _binding!!
    private val employeeInfoViewModel: EmployeeInfoViewModel by activityViewModels()

    override fun onCreateView(
        inflater: LayoutInflater, container: ViewGroup?,
        savedInstanceState: Bundle?
    ): View {
        _binding = FragmentUpdatePageBinding.inflate(inflater, container, false)
        return binding.root
    }
    override fun onDestroyView() {
        super.onDestroyView()
        _binding = null
    }
} Note: Using View binding, we could programmatically interact with any of the above components.

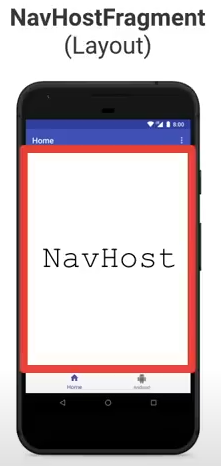
According to Android document, we need 3 entities to setup navigation:
NavHostFragment: Android defined class that hosts the current navigation destination.NavController: Android defined class that is the central coordinator for managing navigation between destinations. It must be "binded" toMainActivity.- Navigation Graph: XML file in res/Navigation to list all fragments that could be navigated around. The fragments are to be displayed within
NavHostFragment's section.
MainActivity.kt:
- Instead to displaying only a single custom Fragment,
fragment_home_page, I use theNavHostFragment, which is also defined on by layout_idnav_host_fragmentinstead. - The
NavControllermust be binded to ActivityMainBinding.
class MainActivity : AppCompatActivity() {
    private lateinit var binding: ActivityMainBinding

    override fun onCreate(savedInstanceState: Bundle?) {
        super.onCreate(savedInstanceState)
        binding = ActivityMainBinding.inflate(layoutInflater)
        val view = binding.root
        setContentView(view)

        // Add the fragment to the activity using the fragment manager and a transaction
//        supportFragmentManager.beginTransaction().apply {
//            add(R.id.fragment_home_page, HomePageFragment())
//            commit()
//        }

        // get a NavHostFragment, and then retrieve the NavController
        // NavHostFragment provides fragment_home_page
        val navHostFragment = supportFragmentManager.findFragmentById(R.id.nav_host_fragment)
                as NavHostFragment
        val navController = navHostFragment.navController

        // Set up BottomNavigationView with NavController
        binding.bottomNavigation.setupWithNavController(navController)
    }
}activity_main.xml:
- This file originally contains a single layout for
fragment_home_page. The fragment should be removed. - Instead we add
androidx.navigation.fragment.NavHostFragmentto the activity, and set the id asnav_host_fragment- Note
app:van_graphmust be defined as theNavHostFragmentusesnav_graph. - Note tools:layout="@layout/fragment_home_page" only help with preview, displaying a fragment without building the app.
- Note
- Inaddition, we also add another fragment's layout for the menu. It is
com.google.android.material.bottomnavigation.BottomNavigationView
The following is an abridged version which many attributes are removed for brevity:
<?xml version="1.0" encoding="utf-8"?>
<androidx.constraintlayout.widget.ConstraintLayout xmlns:android="http://schemas.android.com/apk/res/android"
    xmlns:app="http://schemas.android.com/apk/res-auto"
    xmlns:tools="http://schemas.android.com/tools"
    tools:context=".MainActivity">

    <androidx.fragment.app.FragmentContainerView
        android:id="@+id/nav_host_fragment"
        android:name="androidx.navigation.fragment.NavHostFragment"
        app:navGraph="@navigation/nav_graph"
        app:defaultNavHost="true"
        tools:layout="@layout/fragment_home_page" />

    <com.google.android.material.bottomnavigation.BottomNavigationView
        android:id="@+id/bottom_navigation"
        app:menu="@menu/bottom_nav_menu"
        app:itemIconTint="@null"/>
</androidx.constraintlayout.widget.ConstraintLayout>bottom_nav_menu.xml:
This file is placed in res/Menu and defines the view layout for the Bottom Navigation Menu. It defines the icons and links to navigate to other pages or Fragments.
<menu xmlns:android="http://schemas.android.com/apk/res/android">
    <item
        android:id="@+id/navigation_home"
        android:icon="@drawable/home_id"
        android:title="ID Page" />
    <item
        android:id="@+id/navigation_update"
        android:icon="@drawable/update"
        android:title="Update Info" />
</menu>
Basically the UI screen is divided into 2 parts: the bottom menu and the "body", NavHostFragment, which will be individual fragments such as HomePageFragment when we click on the menu links.
NavController perfectly presents a beautiful advantages of Fragment. The class maintains a stack to keep track of visited Fragment and defines methods to navigate from one Fragment to the next such as:
navigatefunction pushes the given destinationFragmentto the top of the queue (FIFO).navigateUpfunction orpopBackStackfunction pops the top destinationFragmentoff the stack
At first the queue maintains 2 items, the startDestination and home_page if we immediately loads HomePageFragment. This basically allows Back button to returns to home page first and then exit the app.

By default, the navigation queue would pop up the top Fragment and push back the target destination Fragment; the queue size is 3. Thus by default, the navigation provides the path as described in Principles of navigation:
- from startDestination -> List screen -> EndDestination
- on Back button clicked: EndDestination -> List screen -> startDestination

nav_graph.xml
- this file lists all the fragments that can be navigated to, and contained within NavHostFragment.
- the app:startDestination poinst to the 1st fragment that should show up for the first link in Menu.
- each "link" of the menu has
android:idand alsoandroid:namewhich is the fragment class name.
<?xml version="1.0" encoding="utf-8"?>
<navigation xmlns:android="http://schemas.android.com/apk/res/android"
    xmlns:app="http://schemas.android.com/apk/res-auto"
    android:id="@+id/nav_graph"
    app:startDestination="@id/navigation_home">

    <fragment
        android:id="@+id/navigation_home"
        android:name="com.example.myid.HomePageFragment"
        android:label="ID Page" />
    <fragment
        android:id="@+id/navigation_update"
        android:name="com.example.myid.UpdatePageFragment"
        android:label="Update Info" />
</navigation>
nav_graph in general can provide action definition: specific allowed paths from one fragment to next. However, since we use NavController, we don't really have to define such paths.
Note that the fragment file names HomePageFragment.kt and UpdatePageFragment.kt must be consistently used in android:name tag.
Link to full codes: Projects/Android/MyID
Conclusion
With the completion of the Bottom Navigation Menu, so far we could deepen our understanding of:
Activity: includingMainActivityas the entry pointFragment: in general and the interaction ofNavHostFragmentwith other custom fragments. How NavController helps with navigating between different fragments. We understand whyViewis not used to display UI butFragmentin order to provide more flexibility.- View binding: how a UI is displayed or View is generated from XML layout file. How the entire UI screen "attaches" or
binds differentFragmentclasses.
In the next post, UI Implementation in Android with Livedata and ViewModel, I will explore about LiveData and ViewModel that help us update Fragment based on changes in data.
In the blog after, I will discuss about Data Binding that when working with ViewModel even produce more powerful tools.